DIY Christmas Ornaments from Old Books

An Easy Family Craft in Under an Hour
If you’re a book lover, there are few things more painful than admitting a beloved picture book has reached the end of its life, especially when it’s a family favorite. The water damage, the ripped pages, the toddler’s experimental sticker phase — at some point, even the most determined book-repair optimist has to whisper “thank you for your service” and just let it go.
But instead of tossing it in the recycling bin (or sobbing quietly as you donate an outgrown favorite), use it to create a seasonal keepsake or personalized Christmas gift!
You can turn a damaged book or outgrown favorite into a DIY Christmas ornament using just Mod Podge and a simple cardboard or wooden ornament base. This kid-friendly craft is a great way to fill a winter afternoon while everyone is home on holiday break! It is an easy way to save books from the recycling bin while creating a family keepsake you’ll smile at every Christmas. It’s simple enough to do solo in under an hour, or a couple of hours in “kid time,” which is both longer and stickier.

At a Glance: DIY Book Page Christmas Ornaments
Time: About 45 minutes, longer with little helpers
Skill level: Easy / kid-friendly
Supplies: Old picture book or chapter book, Mod Podge, cardboard or wooden ornament, sponge brush or paintbrush
Best for: Repurposing damaged books or turning outgrown favorites into meaningful keepsake ornaments

Supplies for DIY Book Page Christmas Ornaments
You don’t need a fancy craft room for this one, just:
An old picture book or chapter book
Mod Podge glue (either glossy or matte)
Wooden or cardboard craft ornaments (any shape you like)
Sponge brush or medium paintbrush
That’s it! No glitter explosions, no special tools you’ll never use again. Just an easy Christmas craft for book lovers that uses many of the items you already have on hand. This project uses the decoupage method, sometimes referred to as paper mache or papier maché, which is completely beginner-friendly.
Step-by-Step: How to Make Book Page Ornaments
Tear and Prep Your Book Pages
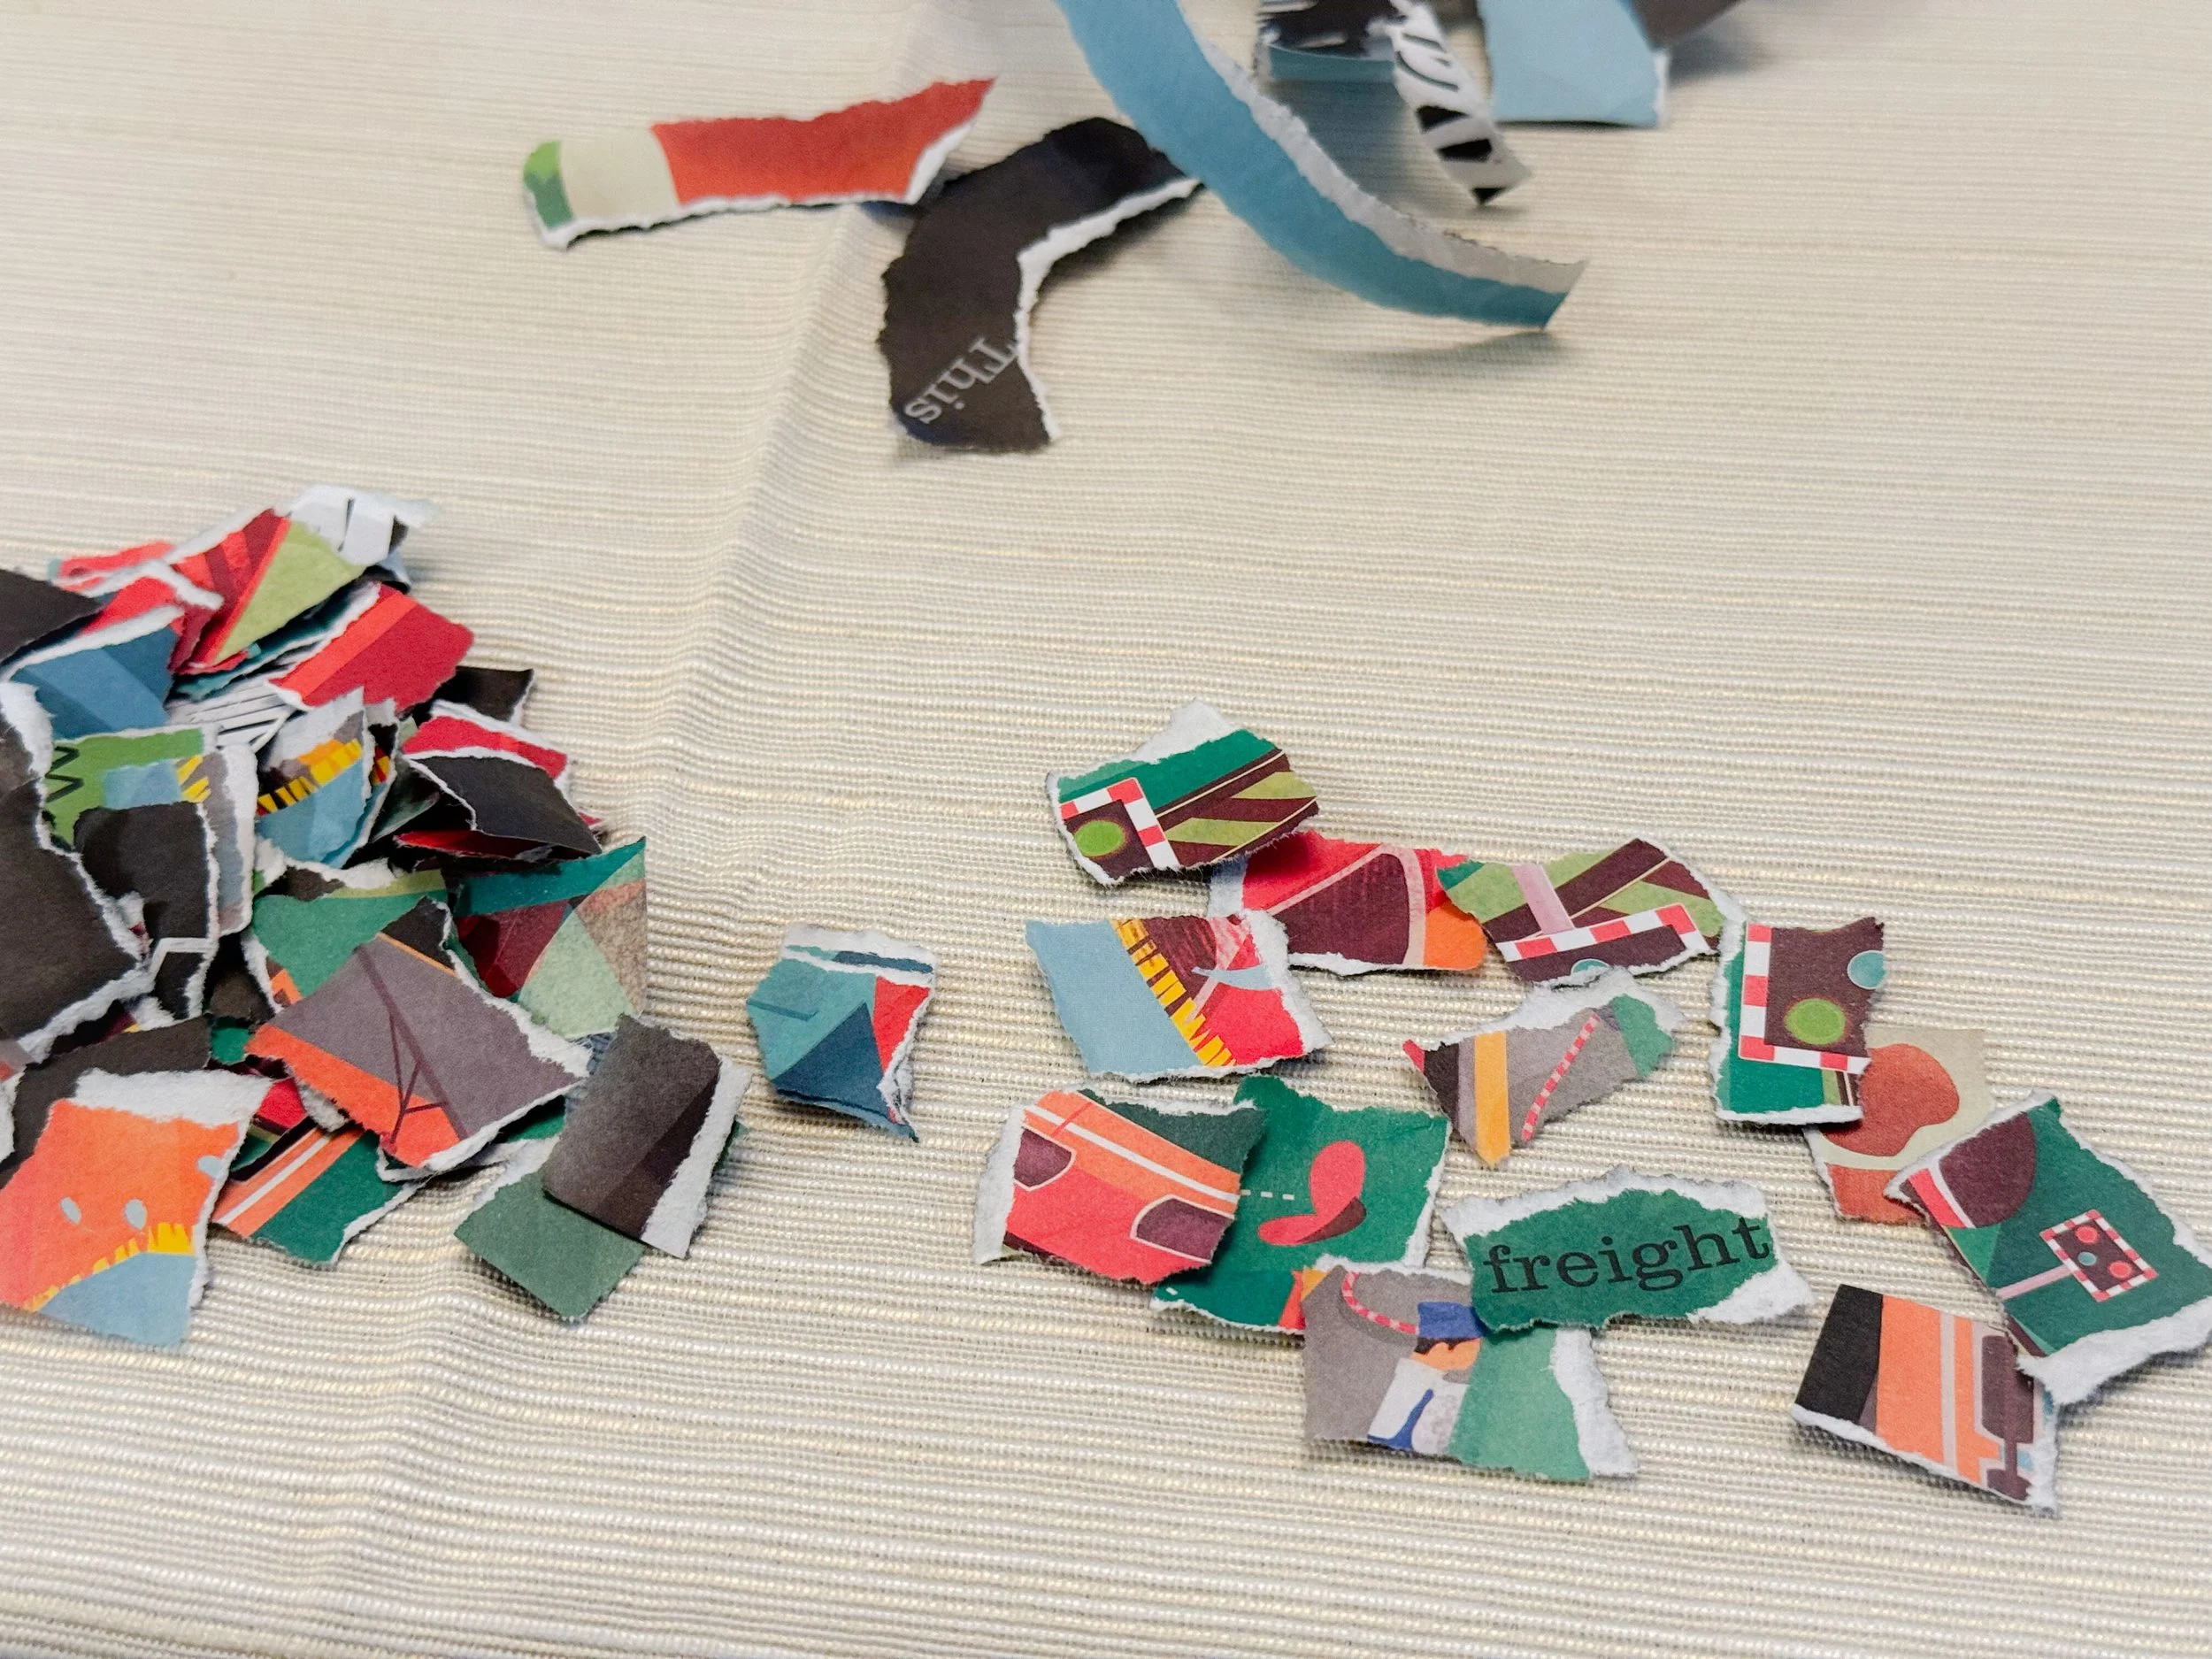
First, tear out pages of your picture book or chapter book. Yes, I know. Deep breaths. This is where we remind ourselves that the book is either already damaged or no longer being read — and this way, it gets to live on in a new form.
Tear the pages into long strips, then tear those strips into smaller pieces, less than 1" wide. Don’t worry about being precise; the slightly uneven edges actually look better for this DIY book page ornament craft.
As you go, set aside any pieces that have details you’d most like to feature on the ornament:
Favorite phrases
Character names
Tiny illustrations
That one little train car your toddler loved
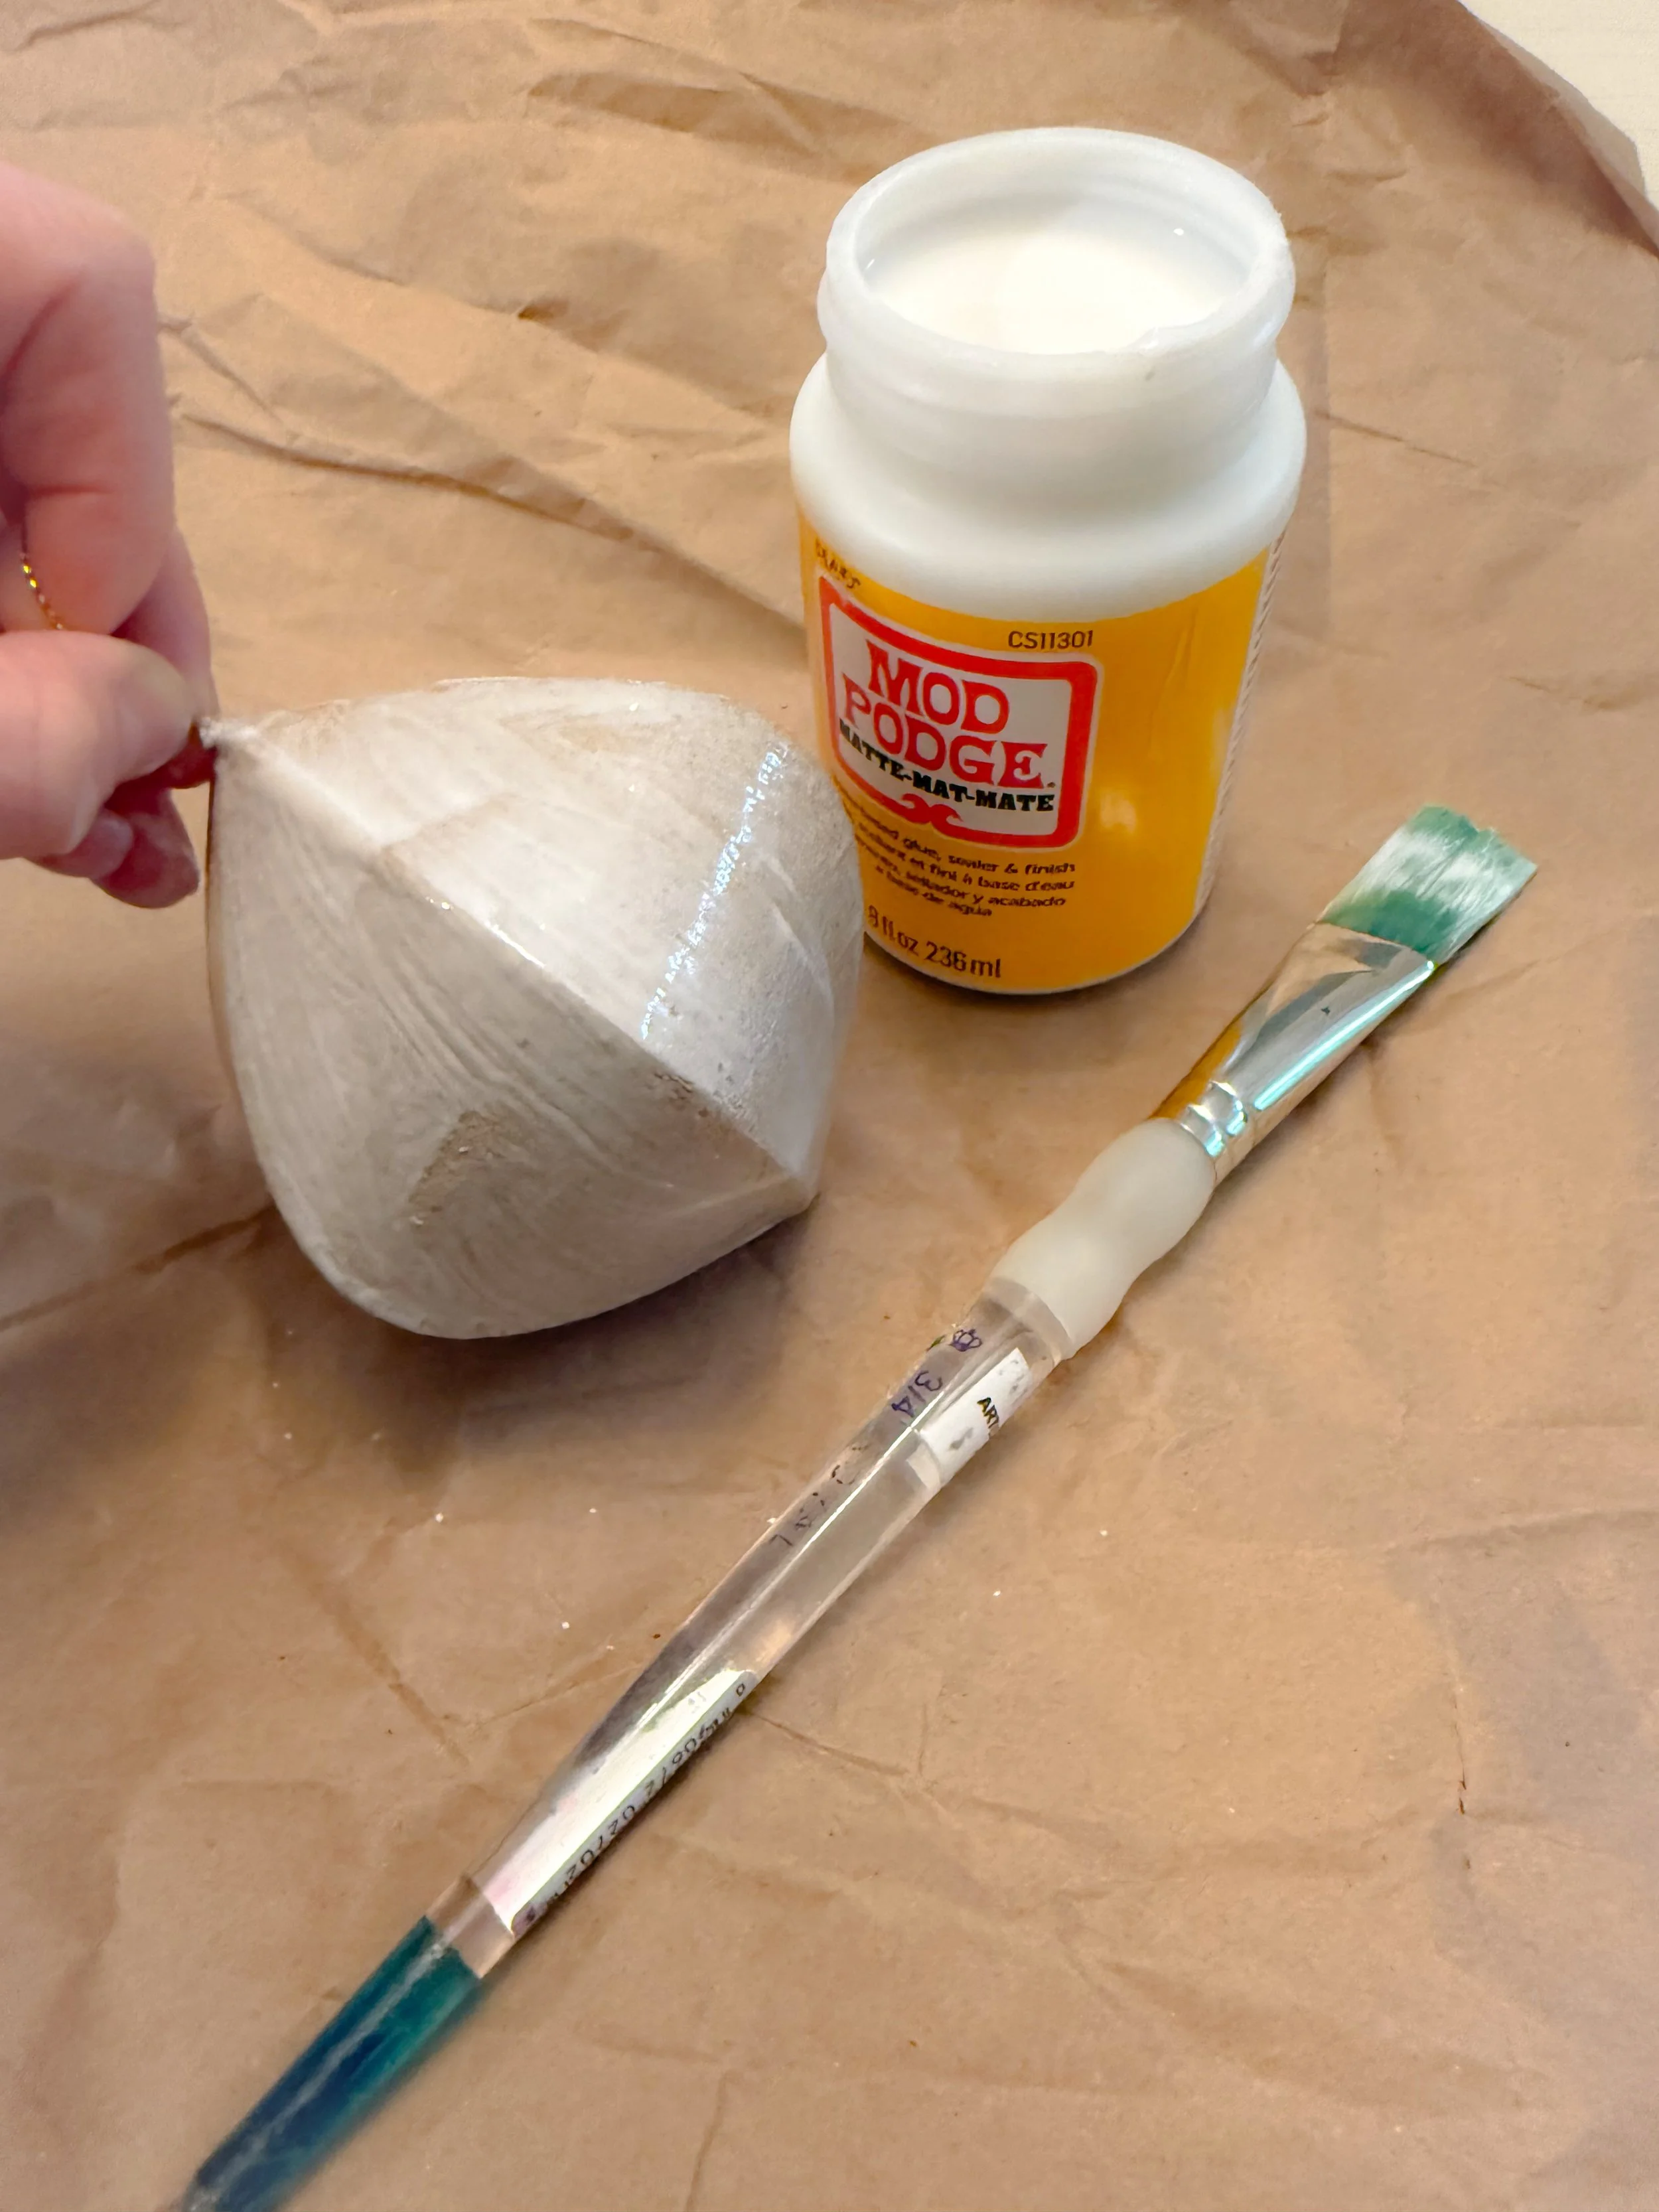
Add Mod Podge to the Ornament Base
Next, grab your cardboard or wooden craft ornament. Using your sponge brush or paintbrush, brush on a layer of Mod Podge over the surface.
If your ornament is on the larger side, it helps to work in sections — cover part of it with glue, add paper, and then repeat in a new area — so the Mod Podge doesn’t dry out before you get to it.
If it does dry out, don’t panic. Mod Podge is very forgiving. Just brush on a fresh layer right over the top and keep going. This is not a perfectionist’s project. “Good enough” will look fantastic!

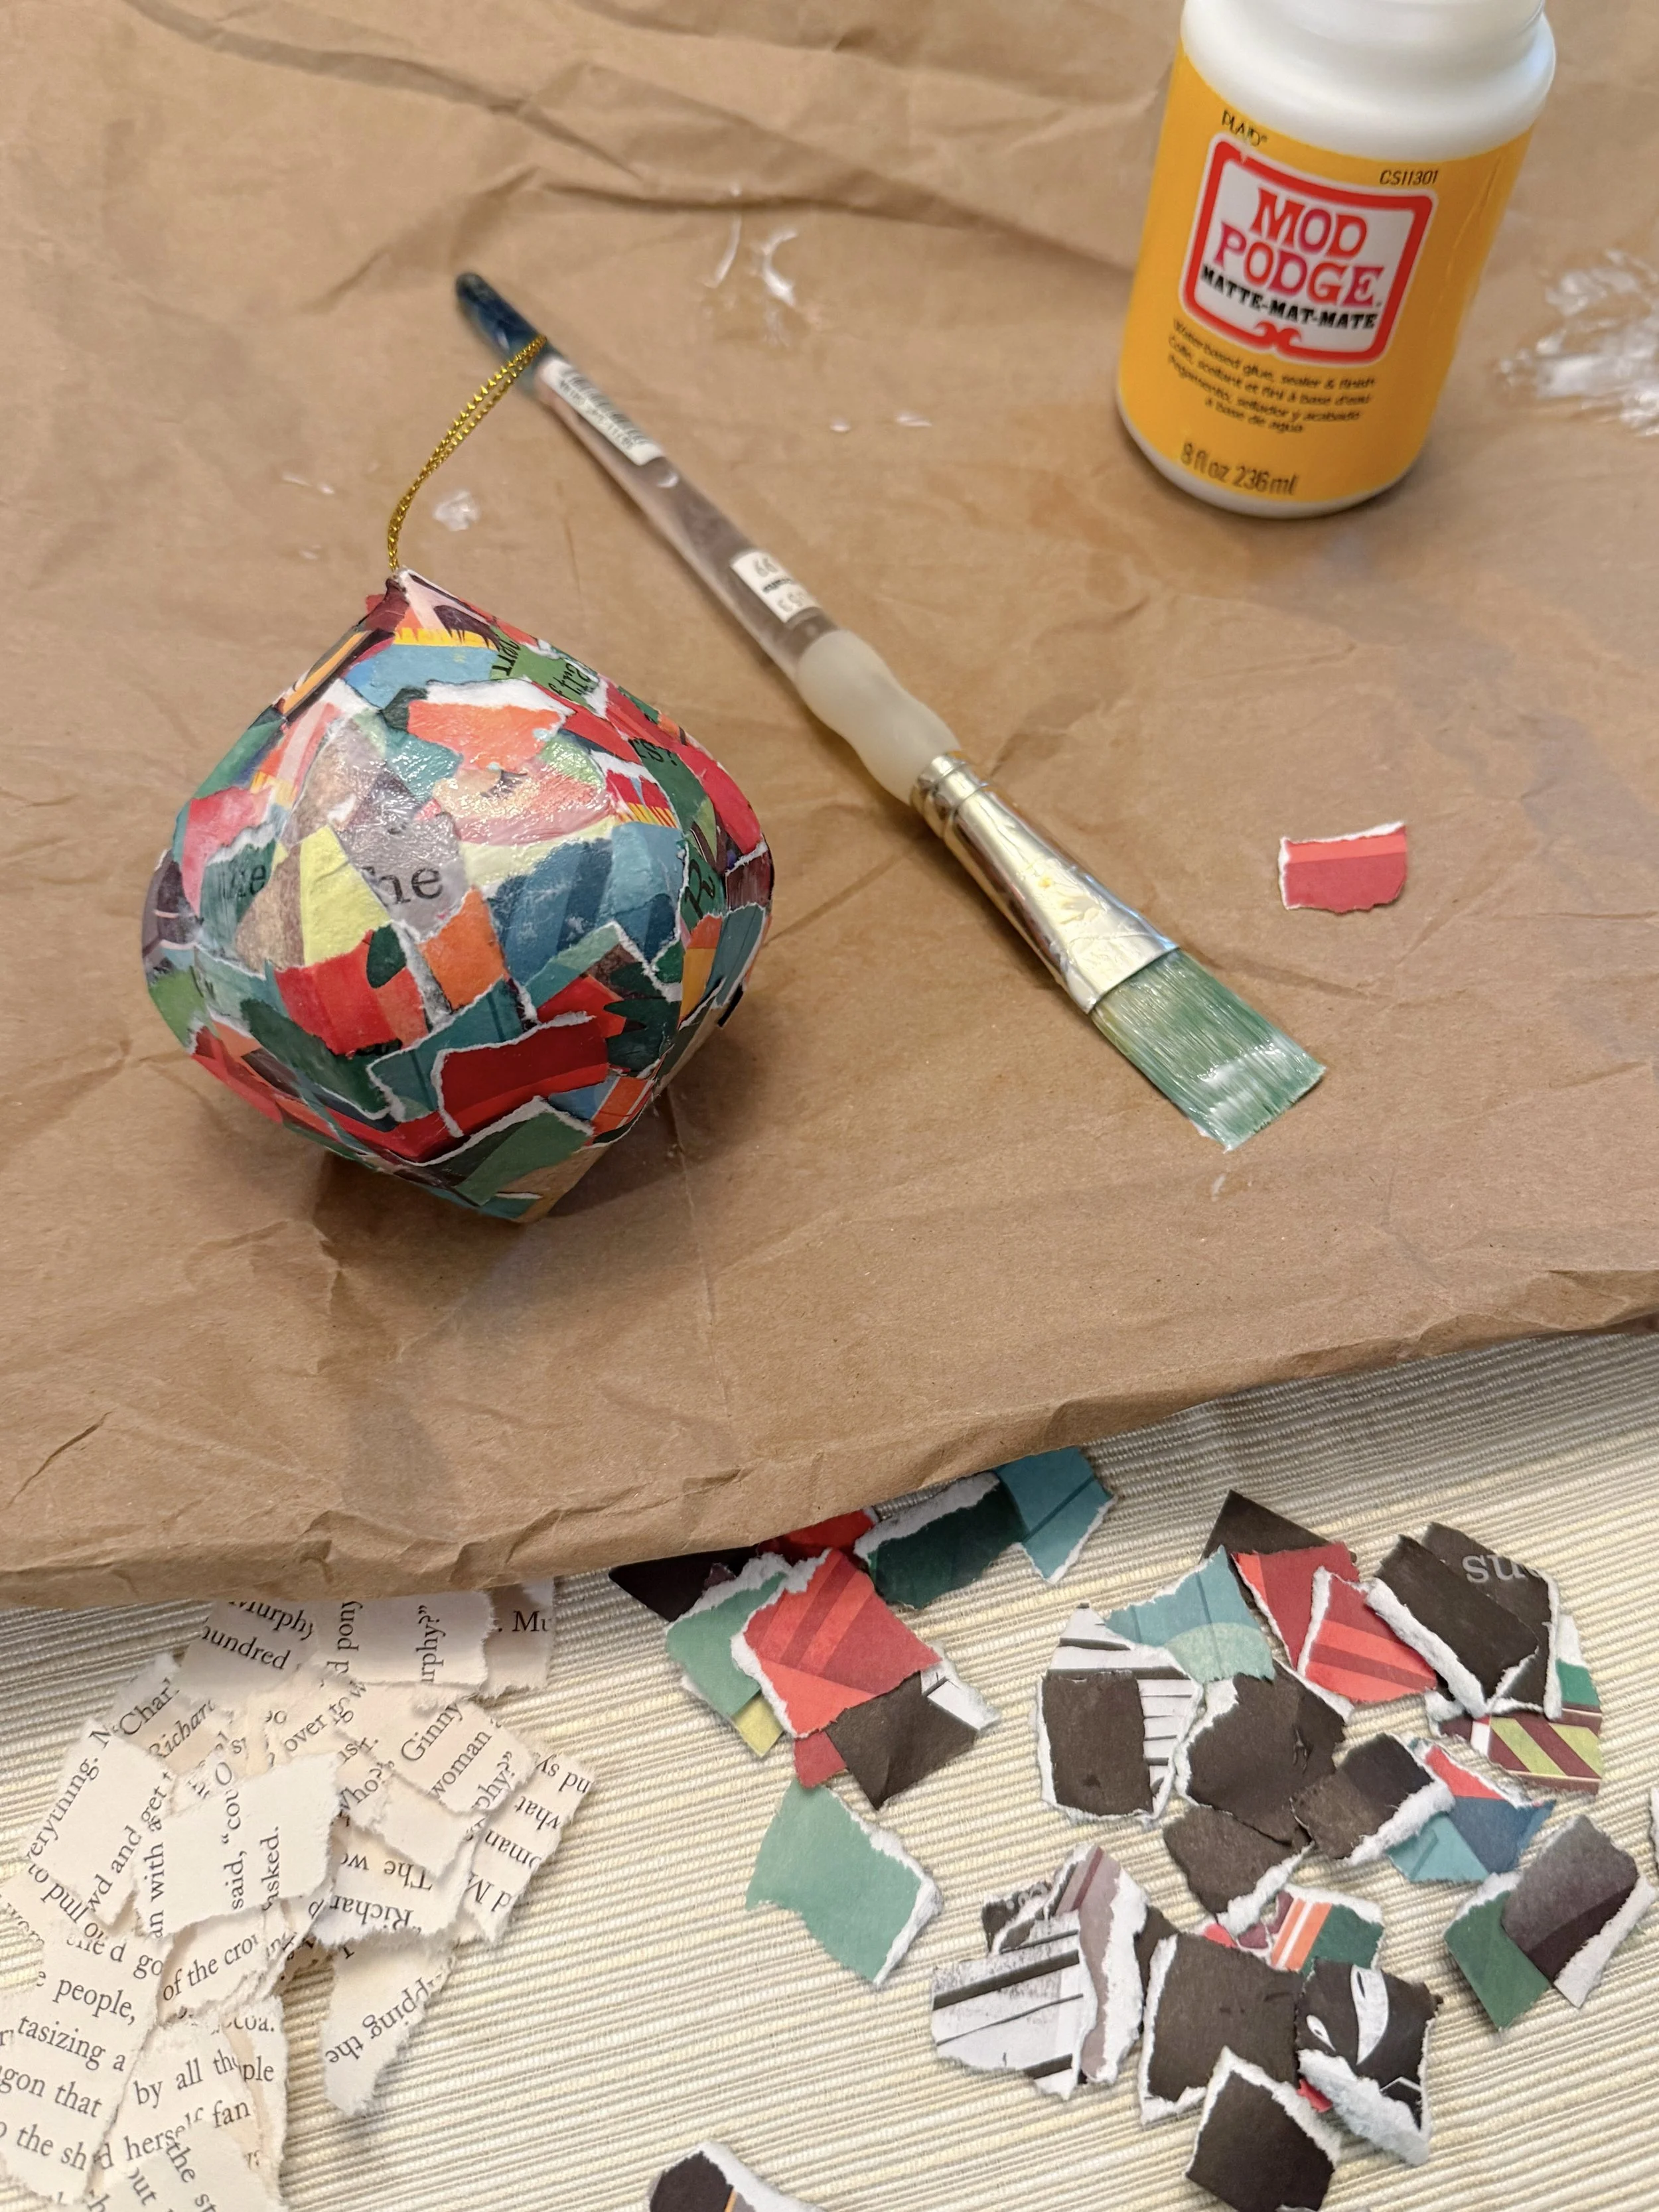
Layer on the Book Page Pieces
Press your paper pieces onto the glued area of the ornament, gently smoothing them down with your fingers as you go. Overlap the edges slightly so the ornament is fully covered and none of the original surface peeks through.
As you work, you might notice some edges sticking up — just dab a tiny bit of Mod Podge underneath or on top and press them down.
Once your ornament is fully covered, grab the little “reserve pile” of your favorite bits: the character name, the picture, the sentence that makes you smile. Layer those on top in prominent positions, like the center of the ornament or near the bottom edge so they’re easy to see.
Let the Ornament Dry
(Quick Drying Tips)
When you’re happy with the coverage and placement of your favorite pieces, set the ornament aside to dry.
If you’re doing this as a quick solo project, you can just leave it for a bit while you clean up or make some hot cocoa. If you’re doing this with kids and the words “let it dry” are testing their patience, you can use a blow dryer on low to medium heat to speed things up.
Keep it moving so the paper doesn’t overheat or bubble — just a gentle warm breeze to help things along.

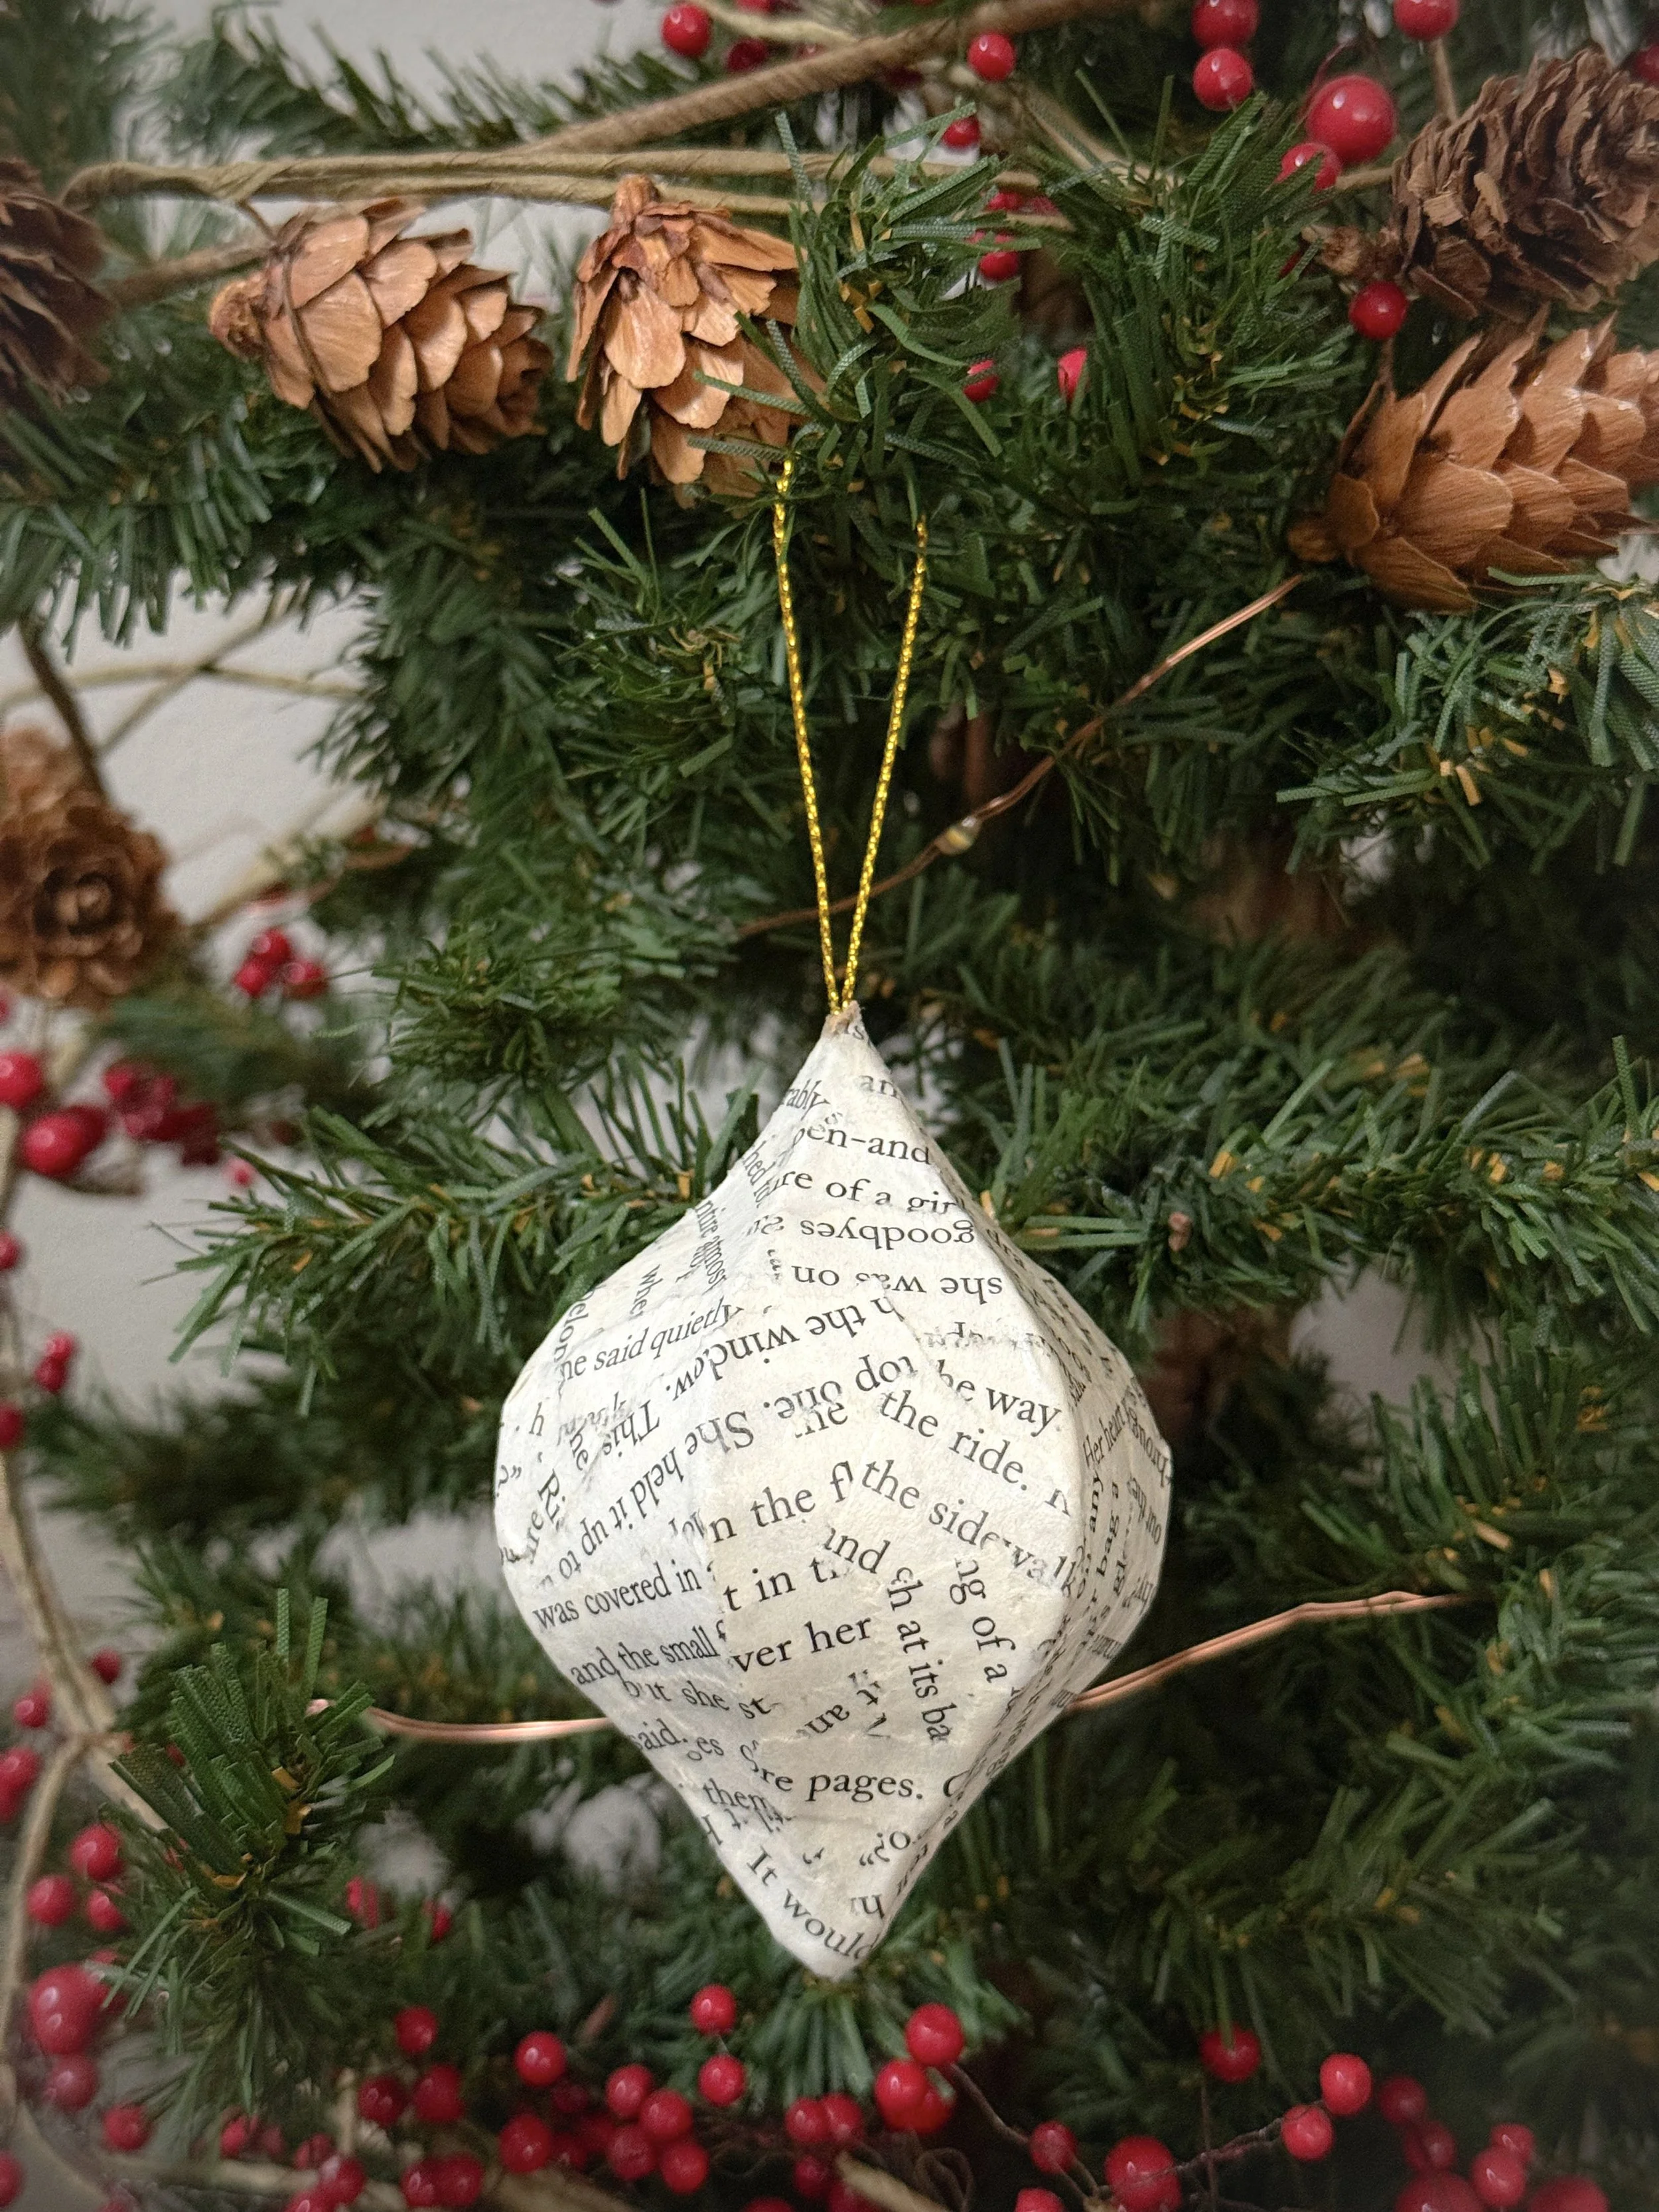
Seal Your Ornament with a Final Coat
When the first layer is dry to the touch, brush on a final coat of Mod Podge over the entire front surface of the ornament.
This works as both glue and sealer, giving the ornament a clear, slightly glossy finish (or high-gloss finish, depending on the Mod Podge style you use) that helps it hold up for years of use.
Let it dry fully again. Once it’s done, you’ll have a sturdy, finished book page ornament made from a story your family has loved!

Example: My On The Train Book Page Ornament
As you can see from the photos, I made my sample ornament using one of my son’s beloved favorites from long ago, On The Train, which had been damaged from a water spill. I pulled out the bits with trains, track details, and a few sentences that remind me of all the nights we spent reading it “just one more time,” and made sure they ended up front and center.
If you’re not familiar with the Shine a Light book series, add it to your list to check out. The books in this series, like On the Train, are total kid magnets, especially because they use a flashlight to reveal hidden pictures.
Variations: Monotone Ornaments from Thrifted Novels
I also made a second ornament using strips from a thrift-store novel — just plain text, no pictures. That one turned into a really lovely monotone ornament that feels classic and neutral.
So if you’re not ready to cut into a favorite picture book (totally valid), a beat-up paperback from the thrift store makes a great starter version. This works especially well if you want:
A more subtle, text-only ornament
A neutral look that goes with any tree decor
A Christmas ornament idea using old books that doesn’t involve sentimental kid titles
A fun and easy book club craft project

Why Book Page Ornaments Make Meaningful Family Keepsakes
On a practical level, this Christmas craft is approachable and low-stress:
Only a few supplies
Easy, kid-friendly steps
A simple craft that helps fill the hours with kids home during winter break
A finished DIY Christmas ornament that is meaningful
But the real magic is in what it represents. You’re taking a book that has already done its job beautifully — a book that’s been read hard, hauled to restaurants, slept on, possibly drooled on — and giving it a second life as part of your holiday traditions. It creates something your kids will see every year on the tree and say, “Oh! Remember when we used to read that every night?”
And honestly? That’s what I love most about this project. It’s simple, it’s quick, and it’s one more gentle reminder that books make it better — even when they’re a little worse for wear.

FAQ: DIY Book Page Christmas Ornaments
Can you use any book for DIY book page ornaments?
Yes, you can use picture books, early readers, or chapter books. I love using damaged books that can’t be donated, or outgrown family favorites that we still want to remember. If the book is in good shape and still being read, I always recommend keeping it in circulation and hunting down a second copy (or a thrift store paperback) for crafting.
How long does this book page ornament craft take?
For adults or older kids, you can easily make an ornament in under an hour. With younger kids, plan on a little extra time for tearing, gluing, overall stickiness, and general “we need a snack break” moments.
Do I need special sealer, or is Mod Podge enough?
Mod Podge works as both glue and sealer. The final top coat dries clear and gives your DIY Christmas ornament a smooth, slightly glossy finish that holds up well in storage from year to year.
Can kids help with this project?
Yes! Kids can help tear paper, choose favorite words or illustrations to feature, and press pieces onto the ornament. Adults should manage the blow dryer and help with the final sealing coat.
Is this a good Christmas craft for book lovers who aren’t “crafty”?
Absolutely. If you can tear paper and spread glue, you can make a picture book page ornament. This is a low-pressure, high-sentiment project — which is much my favorite combination for this busy time of year.
This page contains affiliate links to items used in creating this ornament craft. If you need materials, these shortcut links will help support my small business. Thank you!